My Sliger SM550 case arrived today. All that’s left is the processor, but I finally have enough parts that I can do step one of the build.
Step 1 is: install fans in the case.
I got two Noctua NF-A12x25 PWM chromax.Black.swap case fans. Research indicates that the A12x25 is the Rolls Royce of PC case fans. And I like black. After installing these in the SM550, I’ve decided the thin version of the A12 — the Noctua NF-A12x15 PWM chromax.Black.swap (15mm thick rather than 25mm) might have made more sense in this case. And I say that even though Sliger shows 25mm fans in their gallery and the manual — and will sell you two NF-A12x25 fans (in traditional Noctua brown) to go along with your SM550.
I also purchased two fan grills, but they’re not attached right now. If I do end up putting them in, they’ll be a tight fit. They form a concave — probably to keep wires even farther away from the fan blades. They won’t fit in the SM550 like that — at least not under the motherboard. If I flip the grills they might fit. I tested and it looks like I can install them later without taking the fans out, so I’ve got that in my back pocket.
When I screwed the fans into the bottom of the case, I stripped the hell out of one of the screw holes on one of the fans. (Lotta plastic shavings on my table.) The problem was that the screws were catching on both the case and the fan. I believe this could have been prevented if the case’s holes were just a bit larger — still small enough to hold the screw head, but not so small that the screw catches the case.
Finally, I’m confused about the routing of the PCIE riser cable. At the bottom of the metal sheet that divides the motherboard side of the case from the graphics card side of the case, there’s a cutout that’s just about the perfect width for the riser cable. But the riser cable starts on the graphics card side and stays there (at least until it gets to the top of the case).
There’s also a lip on the graphics card side of the divider sheet that the riser card has to press up against.
I checked several sources, and my case is not the only one with the riser cable routed this way.
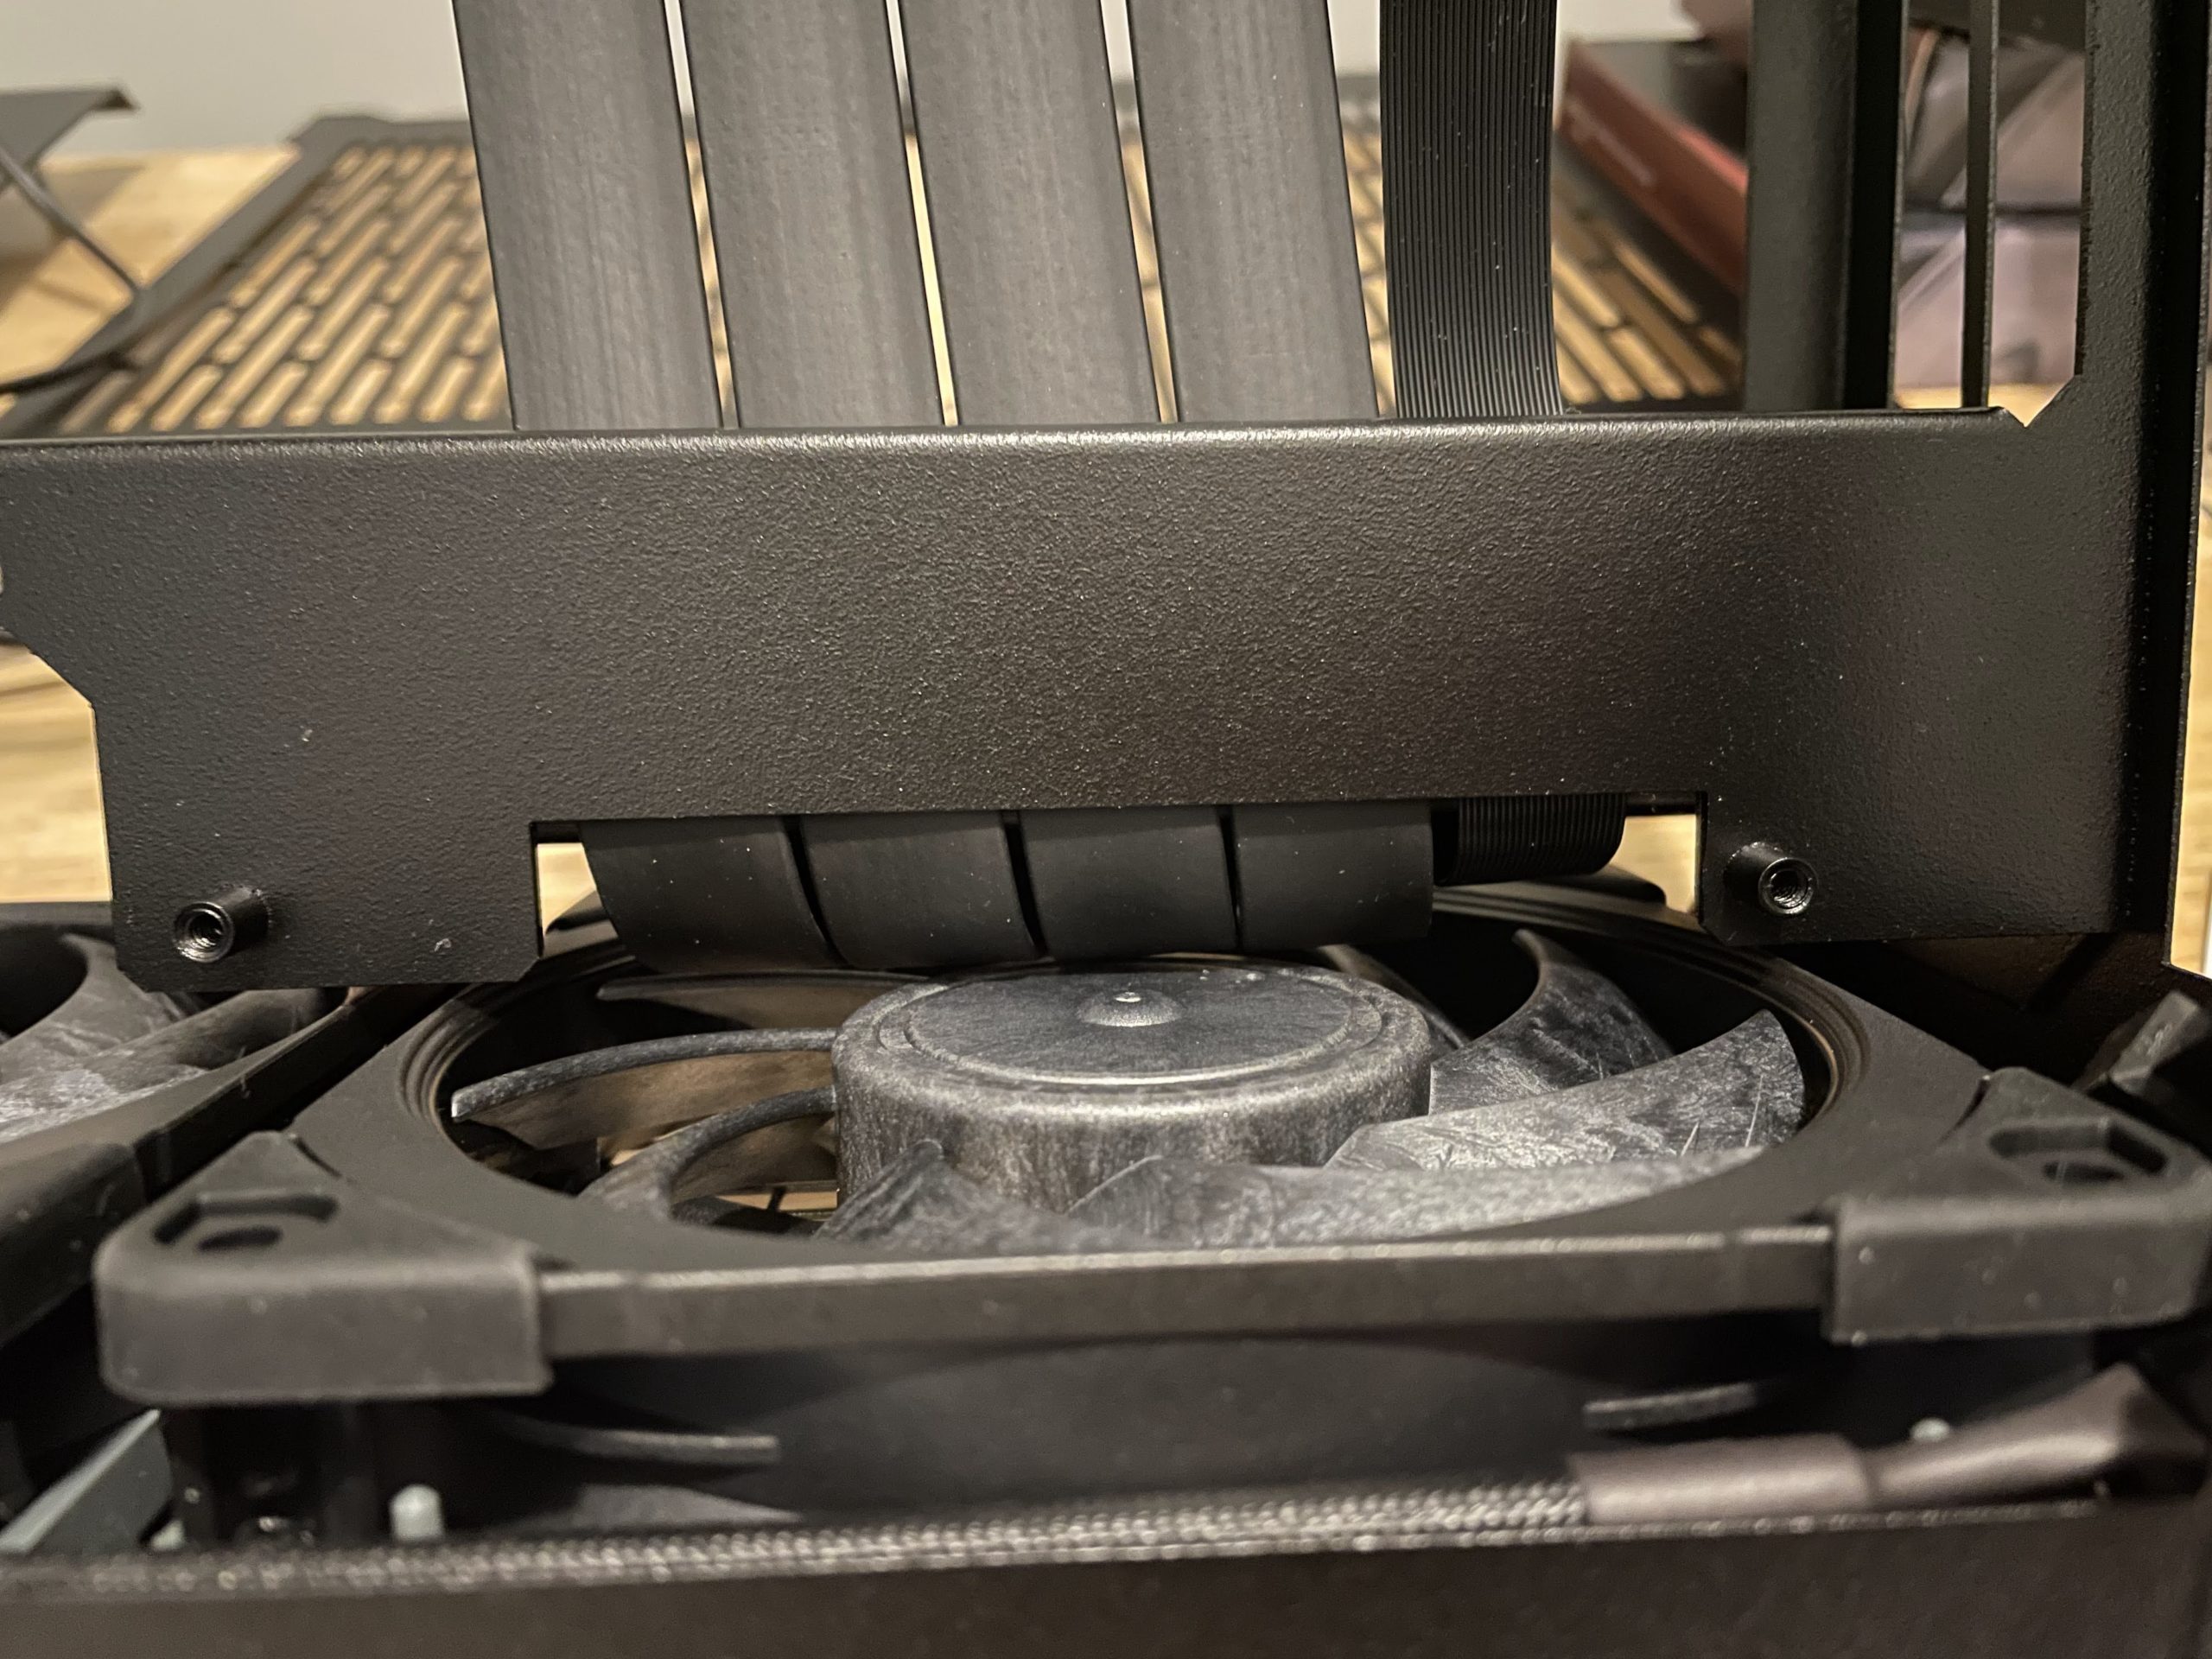
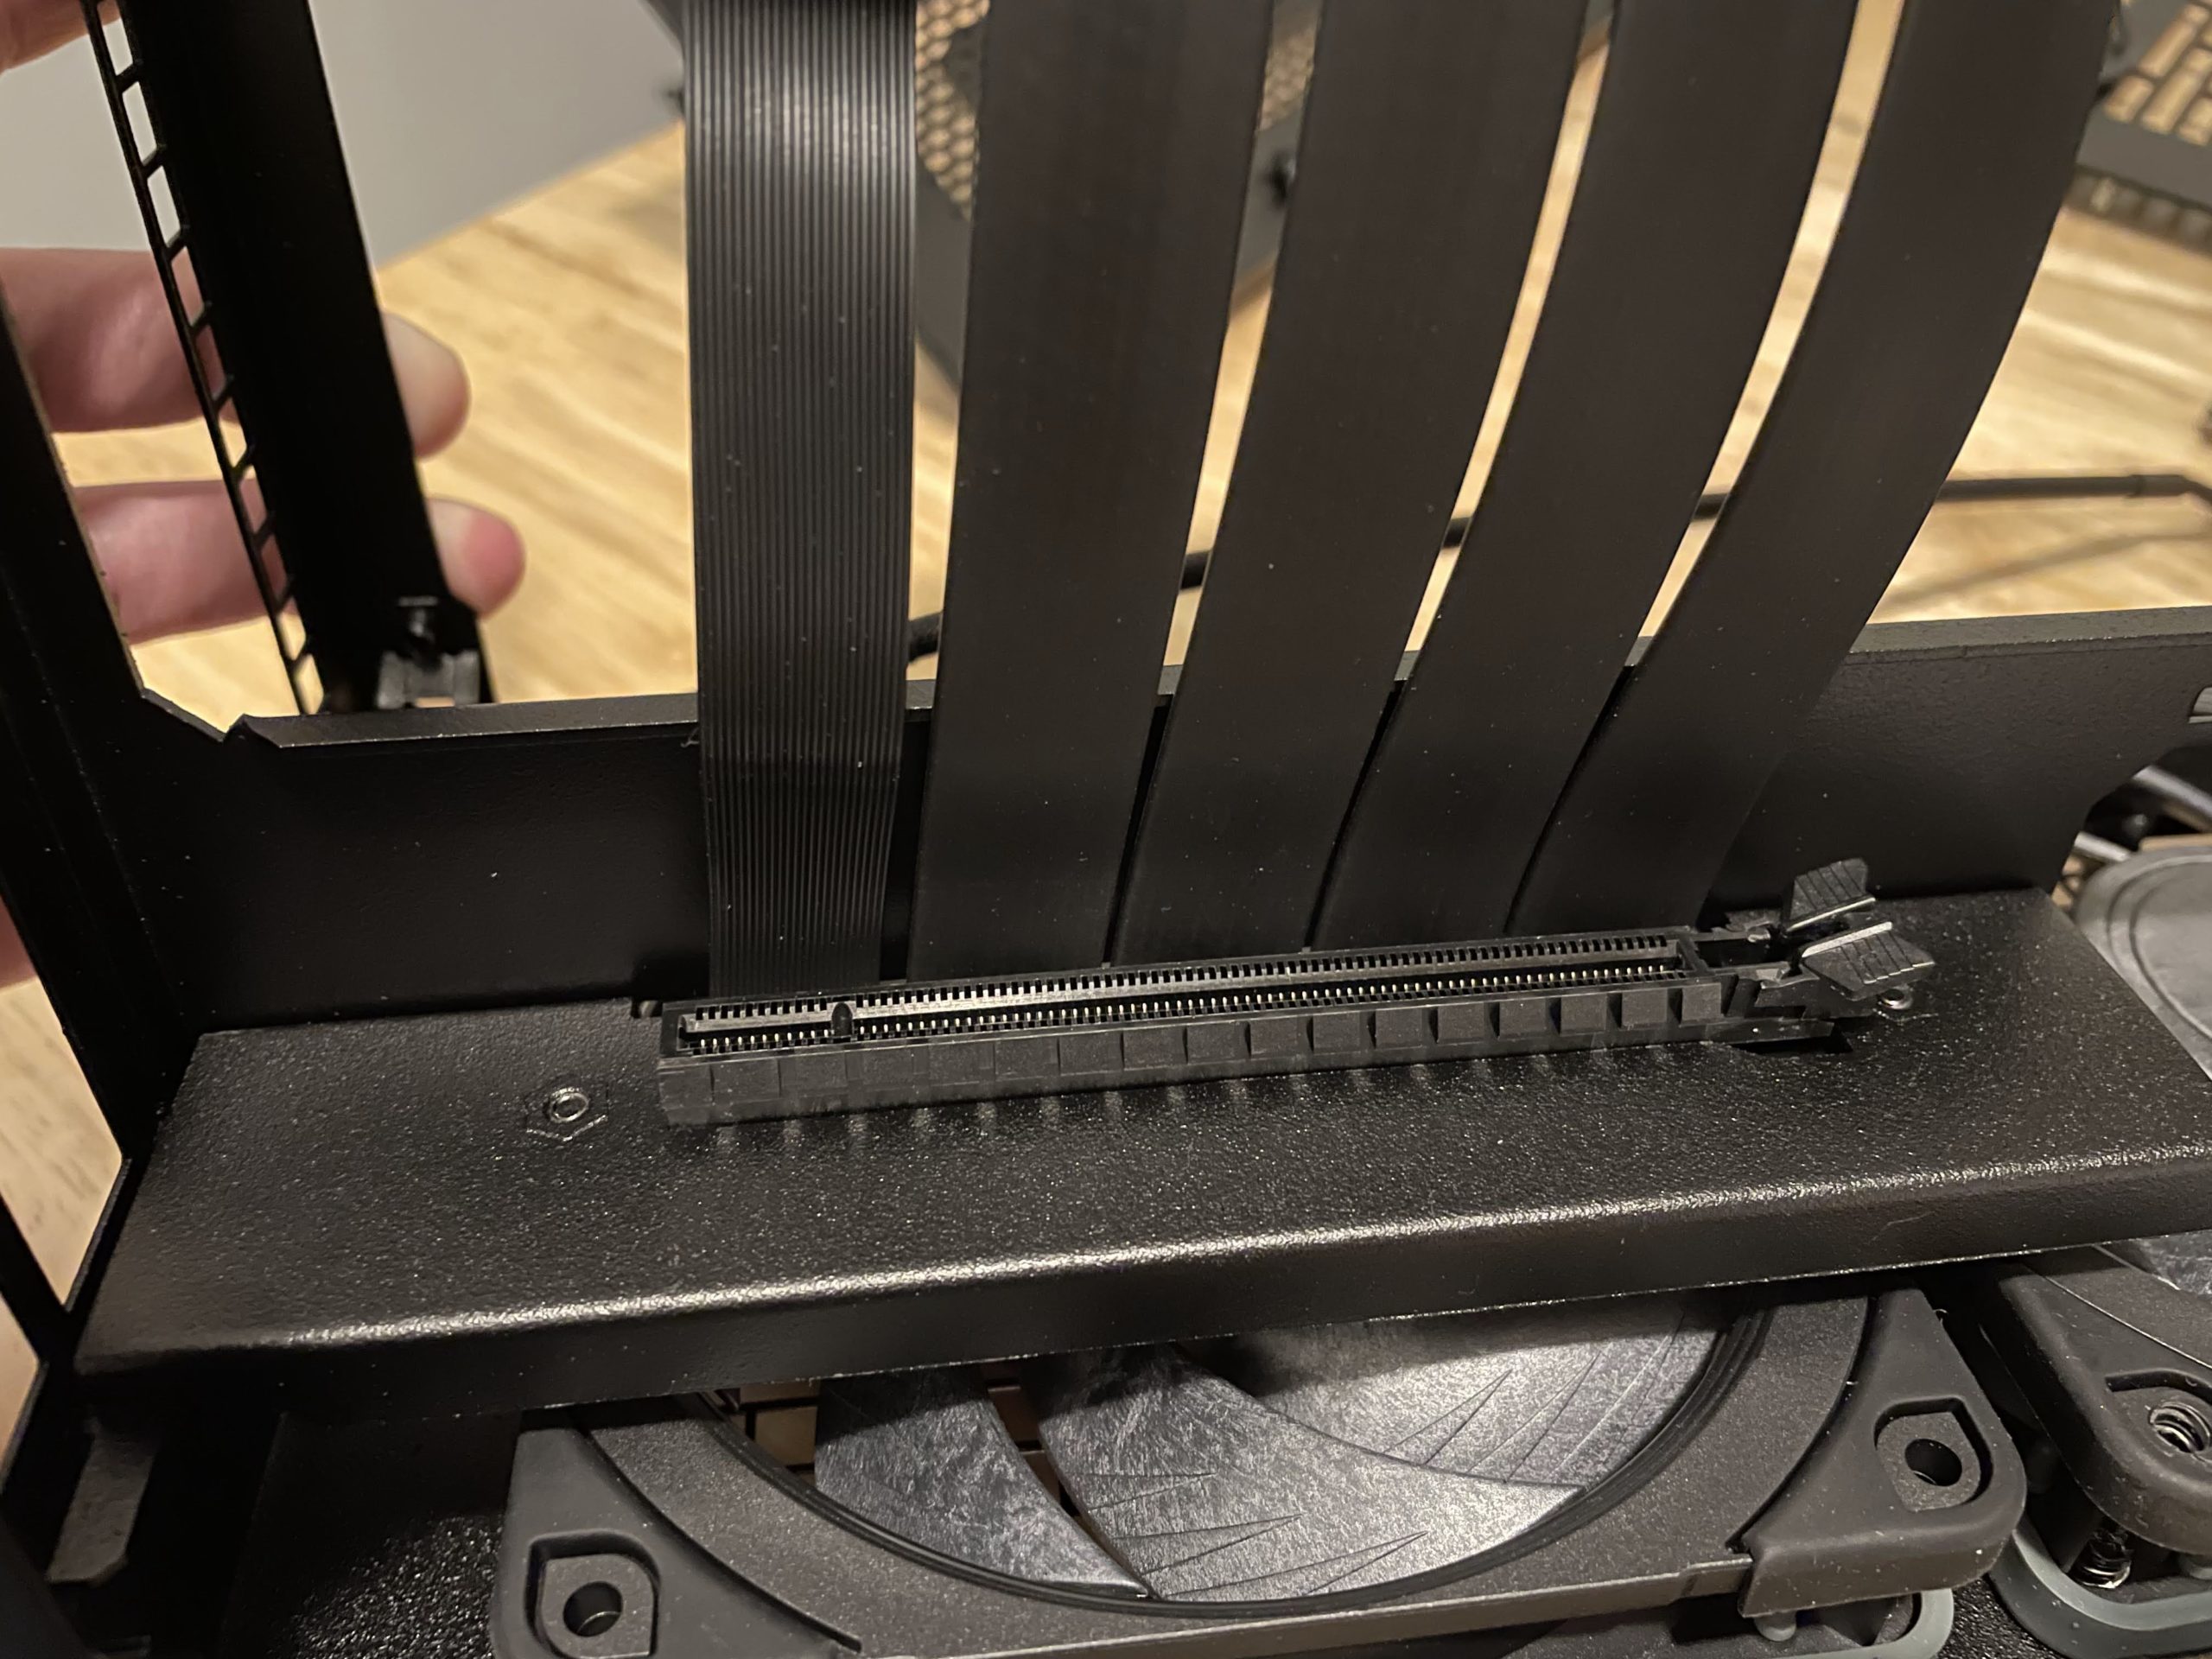
Why do it this way? Is there concern that the riser cable will jut out and put pressure on the bottom of the motherboard? (Edit: Maybe the concern is the CPU cooler’s hardware that mounts on the back of the motherboard.) Or maybe it’s more important to insulate the back of the graphics card from the metal divider than it is to insulate the motherboard. (The motherboard does have standoffs. And a thick video card might be pushed in by the outer wall of the case.)
So maybe that’s it. To insulate the graphics card. But why leave the cutout at the bottom of the divider?
For now I’m leaving the riser where it is. I assume it was done this way for a reason. And for me to move it now I’d either have to unscrew 8 fan screws and then re-screw 8 fan screws, or try unscrewing two screws between the graphics card “platform” and the fan under it — and I’m not certain that would let me make the move.
As for other aspects of my first impression of the SM550, it wobbles a bit — the way a table in a restaurant might. The legs can be unscrewed and I assume it’s to resolve this issue. But it’s a little disappointing for such an expensive case.
And the piece of metal the power supply will screw into is a bit warped. I’m guessing once I’ve got the power supply attached to it, it will straighten out, and the power supply will be straight. But I won’t know until I get there.
That’s probably all I’ll do on the build until the processor gets here. I plan on writing at least one more post on the process.